Written by Colin Theys
I’ve always been drawn to movies that build worlds.
A unique setting can be a powerful storytelling tool and a memorable experience. Would The Thing feel as isolating set in a diner? That said, would creating such locations often seems out of reach for low-budget films. You’re usually stuck with sensible, easy-to-find locations. How many finales happen at a construction site?
There’s a reason for that.
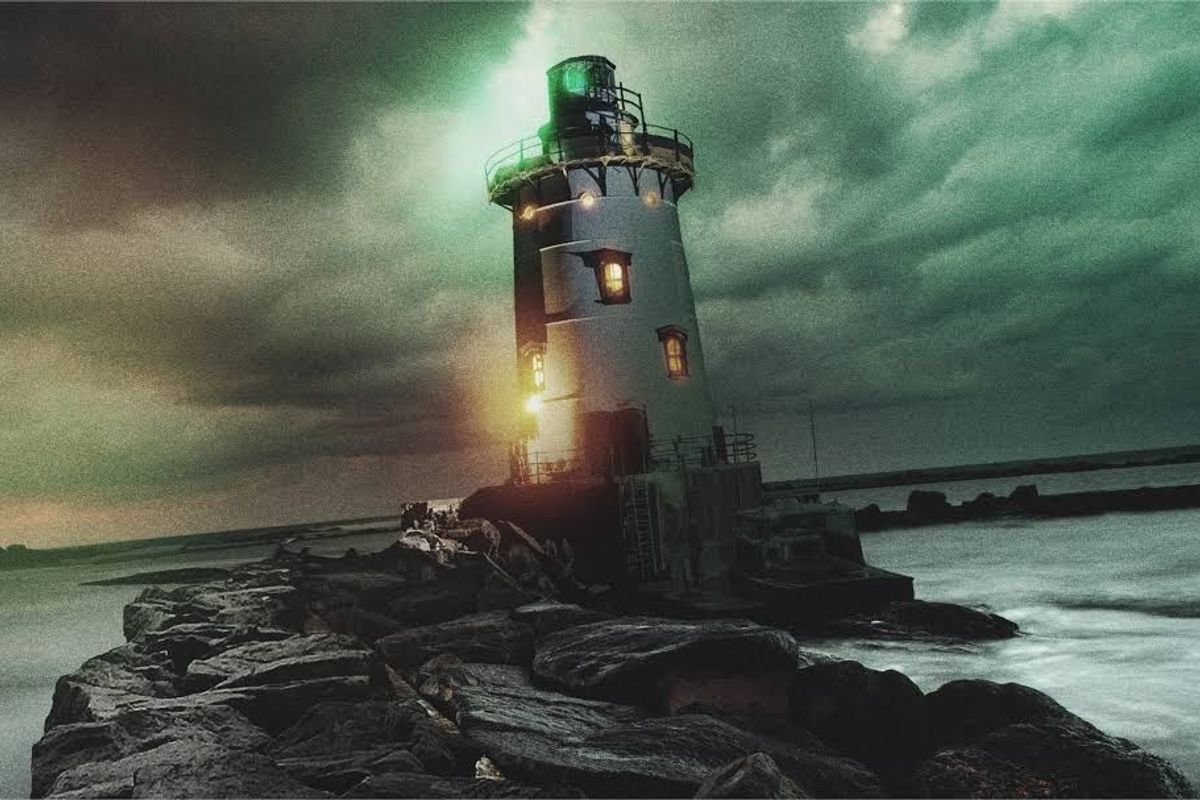
But you don’t need a big budget to create compelling worlds. For Stalker’s Prey 3: A Predator Returns, our the villain lives in a lighthouse on a rocky island in the ocean.
Stalker’s Prey 3 is an ultra-low-budget, campy-fun, made-for-TV movie that aired on Lifetime. We didn’t have much time or money, but wanted to attempt something bigger and more conceptually unique than the traditional suburban stalker story.
The script was originally written for Falkner’s Island.
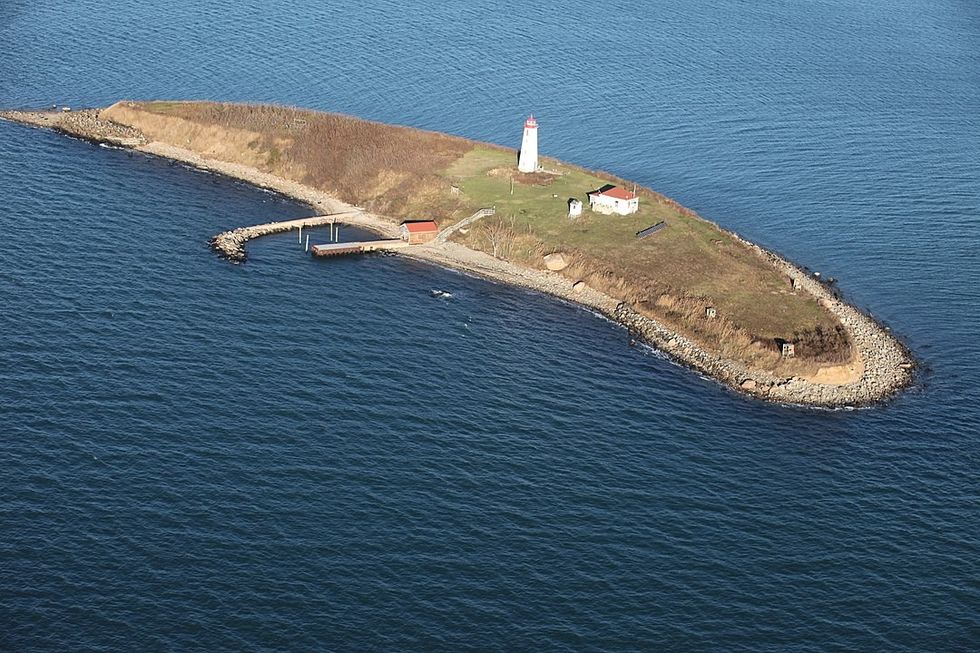 Falkner’s Island image credit Greg Thompson/USFWS (creative commons attribution 2.0 license
It’s a real place with a lighthouse and a few buildings. When we couldn’t get permission to shoot there, we moved to plan B: creating the location ourselves. I identified the essential components for the story: a lighthouse, a dock, a shoreline, and an abandoned house—al isolated feels. Then, we set out to find their real-world counterparts.
Finding the lighthouse was the hardest part. Coastal lighthouses were accessible but surrounded by things we’d need to remove in post-production, which would be too expensive.
That’s when we found the New London Ledge lighthouse, a stunning structure on a concrete block in the harbor.
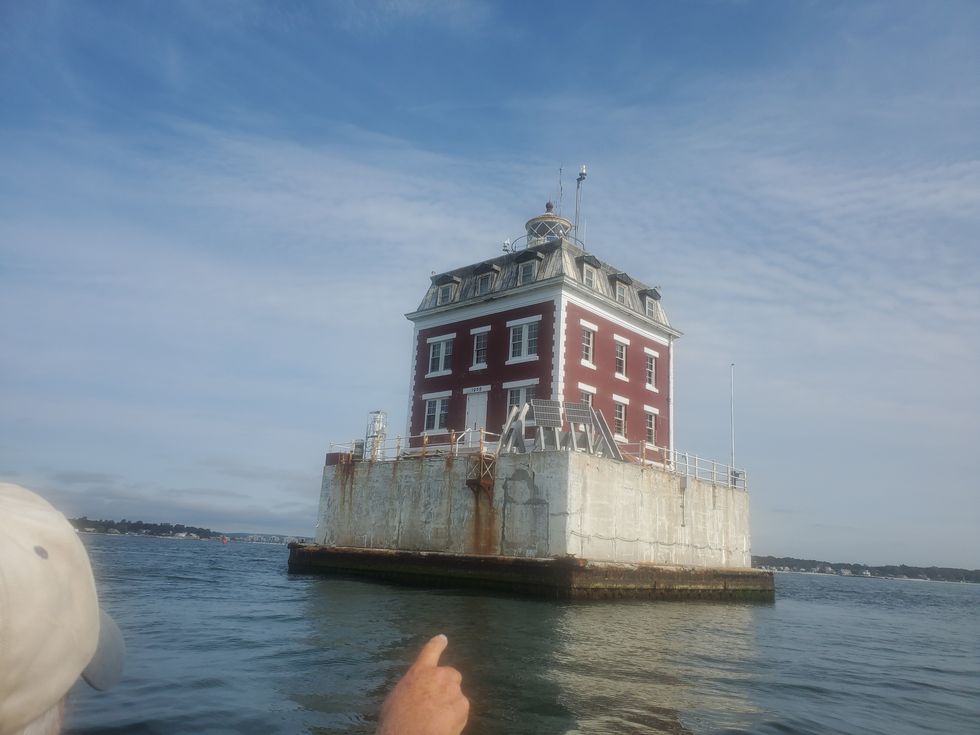 The New London Ledge Lighthouse
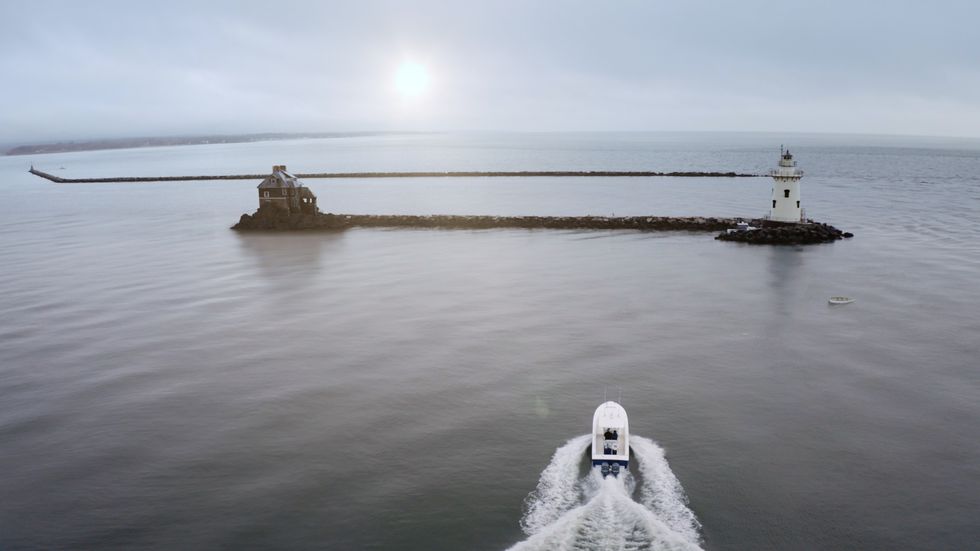
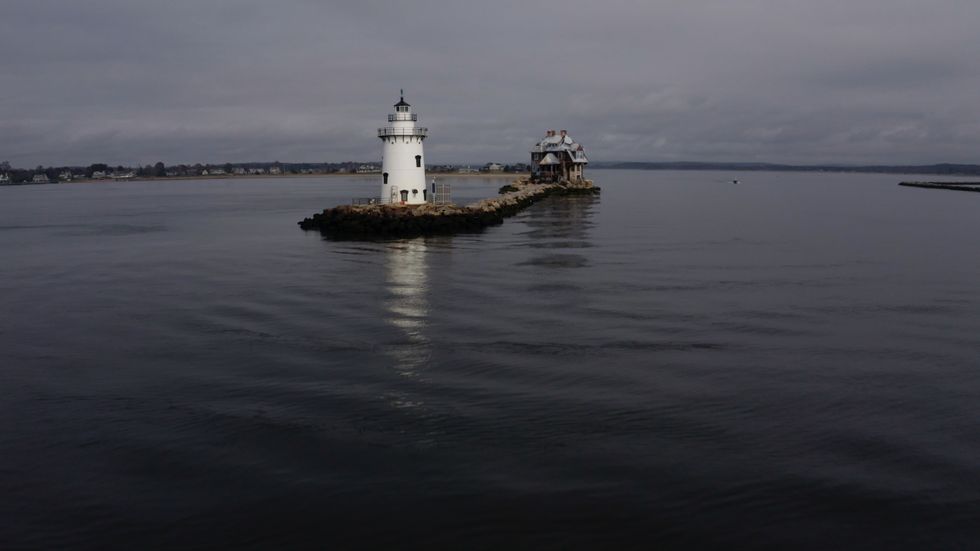
It looked great but was a logistical nightmare with no water, electricity, or outlets for lighting and cameras. Luckily producer Andrew Gernhard found a lighthouse at the end of a long rock jetty, isolated and perfect for filming.
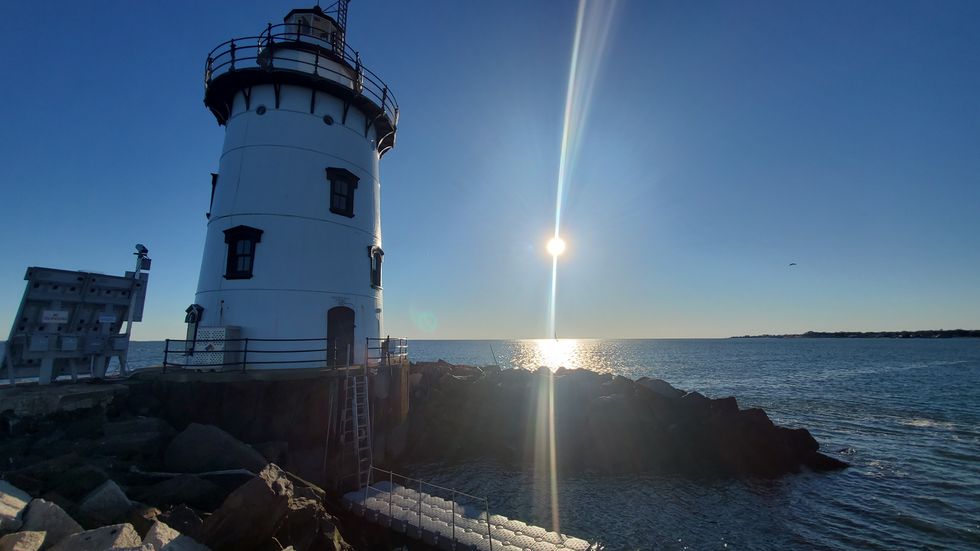 This was our lighthouse.
The exterior was great, but inside the lighthouse was too modernized. So I reimagined the story to place the keeper’s house and lighthouse on opposite ends of an island shaped like a barbell, connected by a rock jetty.
I revised the script to match this new shooting plan, re-working some action to account for the layout. There was no longer a grassy island around the lighthouse to hide on. The entire “island” could be captured in a single frame. The separation offered new opportunities: views from one spot to the other, a linear chase across the jetty, and the fun light from the lighthouse sweeping the keeper’s house once every revolution. Neat!
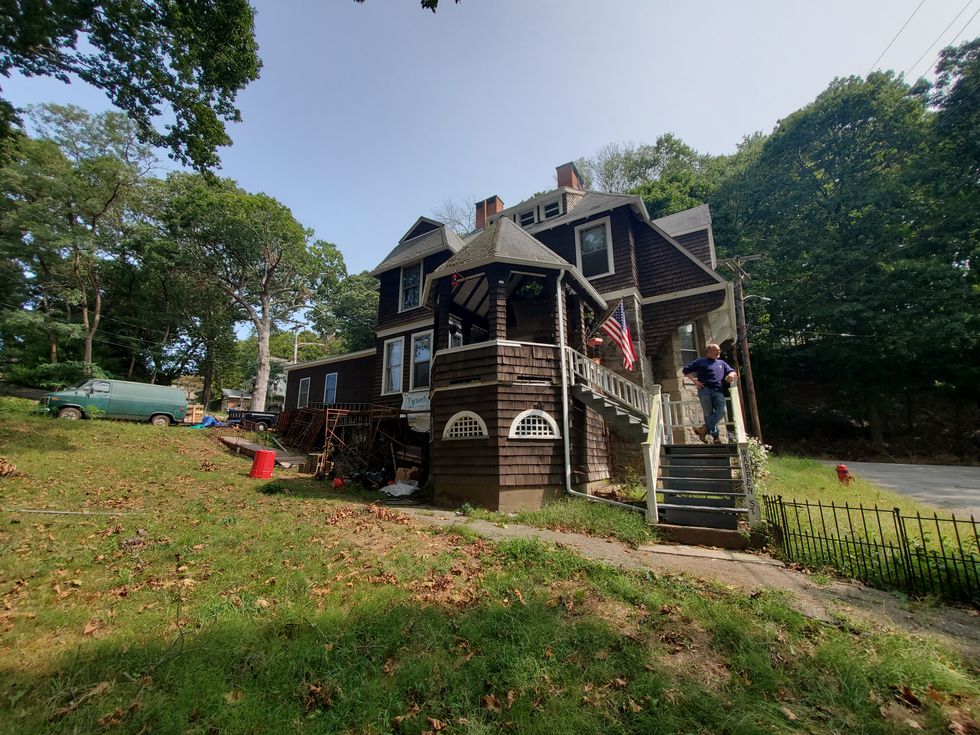
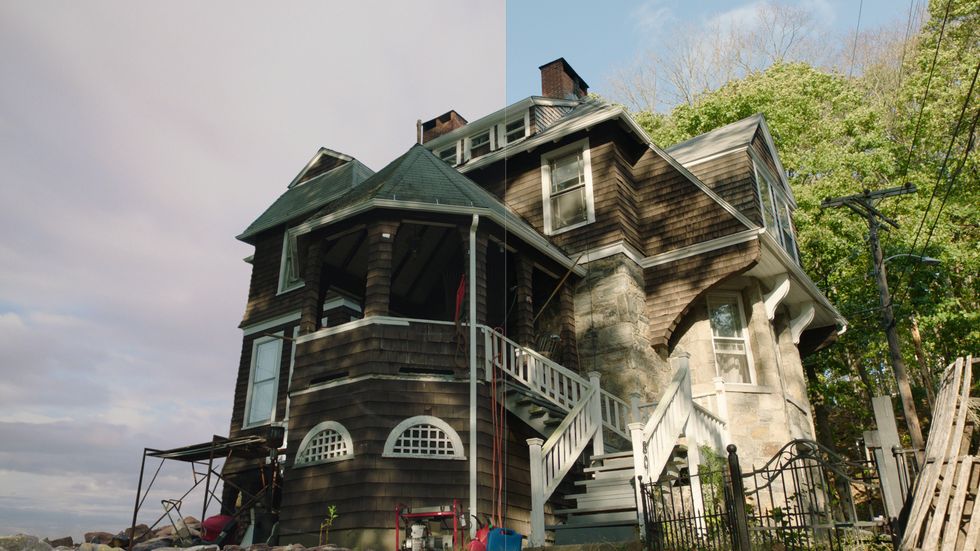
Next, we needed a keeper’s house. We couldn’t find a suitable one on an island, so we used a house in the city with an unobstructed view of the back across its yard. If we could place this house on our fake island, it would work.
With our anchoring elements set, we filled in the details. Swimming at the lighthouse wasn’t safe, so we needed a matching shoreline. I picked a rock jetty on the beach where we were already filming. Underwater shots would be done in a pool with black cloth backdrops. Boat scenes would be filmed at a marina that we were also using for other scenes, giving us easy access to boats. This is the sort of planning that lets a movie get more out of its budget, using locations for multiple purposes.
Planning angles was the next step. Whether using real or fake locations, the shooting plan needs to capture the action and also communicate geography to the audience. Think of it like taking pictures of the inside of a house intended to explain the layout. If you’ve chosen your angles right, after you show someone the pictures, they would be able to answer the question “how would you get from the upstairs bedroom to the kitchen closet?” Then, stage your story on top of those angles.
I thought about which angles would best explain our fictional setting and found the closest approximation of them that I could piece together from real-world spots. Of course, I found the version of that approximation that could also be achieved with our time and equipment.
Too often, even in big-budget films, we see big wide shots followed by tight, disorienting coverage that could have been shot anywhere. That’s not a good solution and it feels conceptually lazy. Story geography should be reinforced throughout the movie, especially if it’s important later. Story geography needs to be really clear because your audience is not actively trying to put it together. To reference my previous analogy, the person you’re showing the photos to doesn’t know that they will be asked a question after seeing them. The audience of your movie needs to understand the space as a side effect of watching the story unfold. In this movie, I wanted the space well understood so that when we get to the finale, we know what the hero’s options are she tries to escape, run, and hide.
Starting with the house, I decided the back porch would face the jetty and lighthouse. This minimized compositing. When the camera was on the porch looking toward the door, no compositing was needed at all. It was just a house.
When looking toward the lighthouse, we shot on the jetty, also without compositing.
With the camera on the porch looking at the lighthouse, we placed a green screen in the yard to comp the lighthouse beyond the porch, which itself obscured the seam where locations met below the frame.
We also needed to see the house from the lighthouse direction. For close shots, we filmed the house from the yard and cut it out, putting the real house on a virtual island.
For distant shots, we made a digital version of the house because there was no real-world way to get a sufficiently distant perspective on the house. I created a digital island and planned coverage at the lighthouse to show the house sparingly, avoiding a heavy VFX load.
We also needed aerial shots. This would help establish the big picture and also to match the style of the rest of the movie. To achieve them, I used the same digital house, shortening the jetty and placing the house at the new “end.” Drone shots from the lighthouse side kept the house away from the camera, making the island and seam between real and fake simple. I mostly used 2D pictures of rocks.
Next came the special stuff.
The movie opens with a 10-page shark attack sequence at night, where kids sneak onto the island, have a bonfire, swim, get attacked by a shark, and are rescued by the villain’s boat. This big set piece is both inciting incident and designed to establish the the geography of the location.
There’s a lot of detail about this sequence in my video, but the basic approach was the same. I broke down the things that needed to happen into places that we could shoot them. While we were allowed to swim at the lighthouse, it would have been dangerous and difficult for a whole host of reasons, so I opted to double the rocks of the jetty with another jetty on a beach we were using elsewhere in the movie.
For shots in the water, we used the ocean right off of the same beach next to the jetty, using the jetty for a light placement. We shot in a pool with black fabric backdrops to get some more controlled water shots, including underwater shots. And we shot at a dock to get the boat actions as well as climbing out of the water.
Then I had to tie everything together.
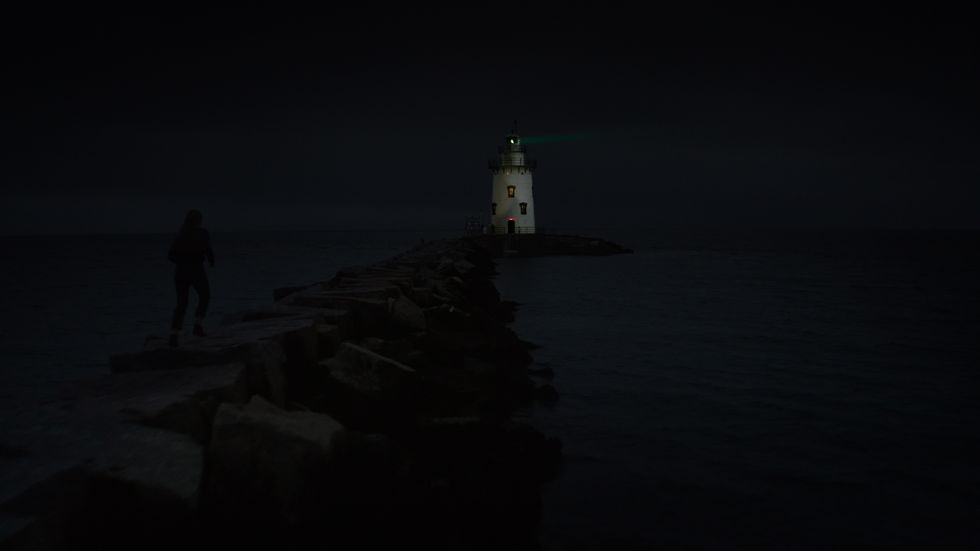
A dinghy was the target of the swimming contest. We hauled it to each location: the beach, pool, and the lighthouse. Lighting can help audiences understand geography. In this case, we put a spinning orange safety light in the dingy. The lighthouse had a spinning green signal light. These two colored lights were easy to spot, but also motivated extremely identifiable lighting. A character with green on one side and orange on the other would be identifiable as between those two objects in the story space.
Some minimal compositing linked it all up. I put the lighthouse into wide shots at the beach jetty and the dinghy into shots looking out to sea.
There are loads of other tricks too of course, like staging action to ensure your characters move actively between the key spaces to force the audience to link them. I really wish I had been able to do more of this in this project.
In it’s most basic for, for instance, you could show a host character walk from a kitchen to the front hallway to say goodbye to a guest. The guest picks up a coat on the way out the door, revealing the living room. And then the host walks to the bedroom, establishing that the windows face the driveway. Now the audience knows which direction the kitchen windows face, and that someone in the living room could see anyone coming or going.
The most important step is tracking your geography.
Na important note: you may have it all planned out, but the crew and cast won’t know the plan. Explain the artificial space to everyone ahead of time.
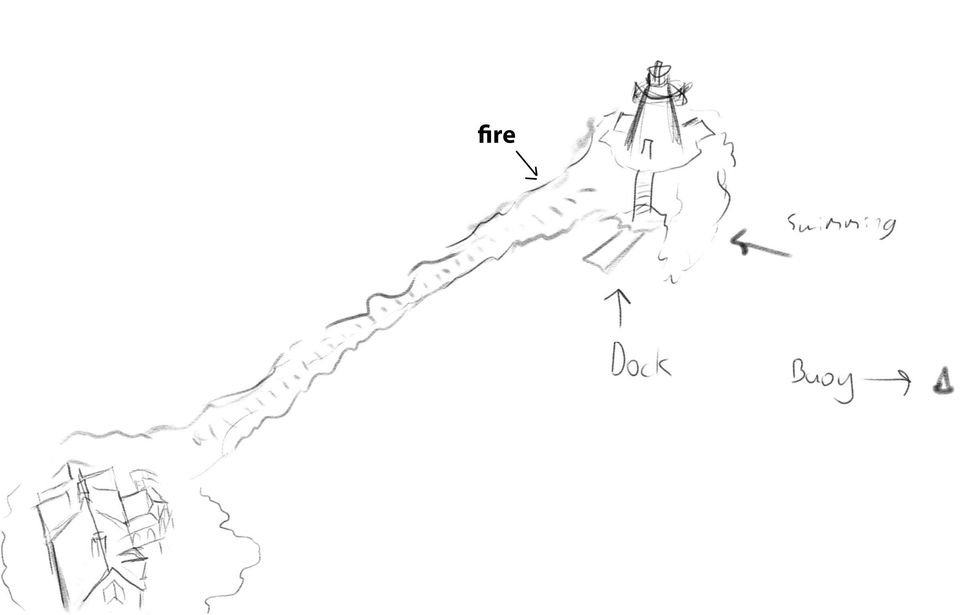
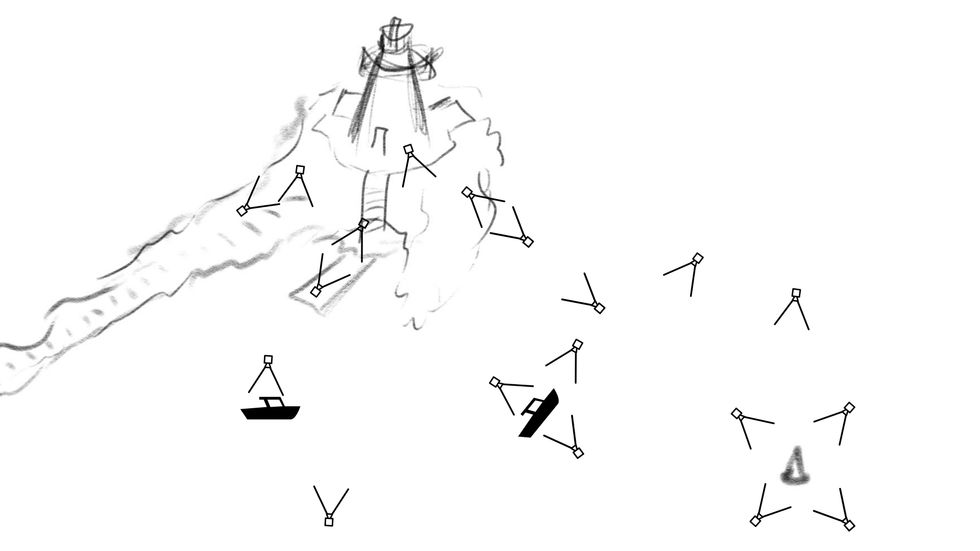
I drew a map and, at each location and in each new setup, explained where things were in the story space. I checked eye lines and light positions to ensure everything is properly situated. This one scene was shot across five locations, five days, and 13 physical configurations with different geographical cheats.
It’s important that everyone trust that you have a plan, so do your homework.
At its core, this is about simple filmmaking tricks adding up to build a coherent space. I’m not saying that this illusion was perfect or that it looked photorealistic, but it was understandable to the audience and let us do bigger and cooler things on a movie that otherwise would have had none of it. These techniques aren’t tricks only visual effects professionals use. It’s work I was able to do my myself with commonly available software in the same production period as any other Lifetime film.
In prep, decide to “assemble” the location.
Then determine which angles to show and identify how to create them from real-world elements. Use eyelines, motivated light, landmarks, and other cheats to build as many links between your real shots and the points in your scene’s story geography as possible. Complete the illusion with some simple compositing, hiding seams and weak spots. Be flexible and revise the plan as needed.
Try to find ways to use locations for more than one purpose to get more on-screen variation out of fewer physical moves. Low-budget filmmaking requires adaptability.
Know your tools and be ready to move your goalposts.
Author: Guest Author
This article comes from No Film School and can be read on the original site.